Deliri-yum Apple Pie from The Pieous
Hi all! Head Nerd Grace here, and today we've got a recipe from special guest contributor Jessica Leigh Clark-Bojin, aka The Pieous. I spotted her pies on Instagram and immediately had to ask how she made them. Be sure to check out her instagram for even more nerdy goodness (the new Star Trek:TNG pie is my fave). Onto the pie!
Hi there, my name is Jessica Leigh Clark-Bojin and I think pies are awesome! I am chuffed to share one of my recipes with you on Sugared Nerd… Hope you dig.
I’ve only been baking for a year, prior to that, I don’t think I knew where my kitchen was (seriously, I’ve burned instant noodles). I got into to pie-making out of desperation one day (a story for another time). Needless to say, I’m a fan of failing and learning, so with each new pie I pick a new subject matter and a new technique that I haven’t tried before. Sometimes it blows up in my face, but sometimes it leads to a neat discovery that opens up a lot of new possibilities for me…
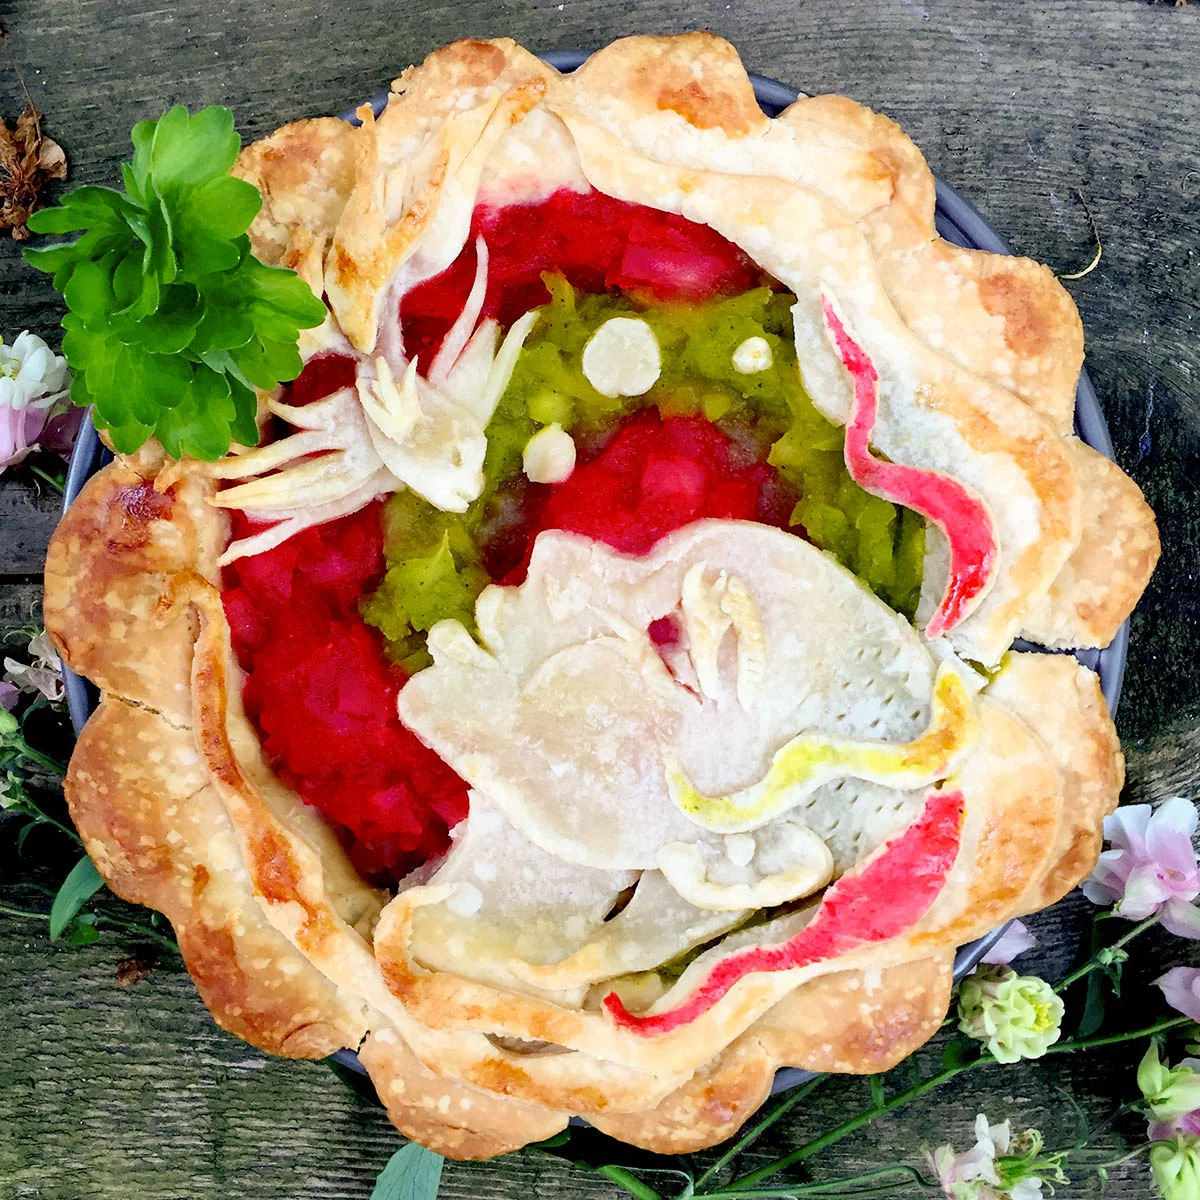
For this particular pie, I knew I wanted to try something with coloured filling, and I threw it out to my friends for theme ideas. I’m big fan of Neil Gaiman and the Sandman comic book series, so when one of my friends suggested I make a pie of the character “Delirium of the Endless”, the final design immediately popped into my head and I got to work.
Deliri-yum Apple Pie
Ingredients + Supplies
- 5” pie pan
- sharp knife
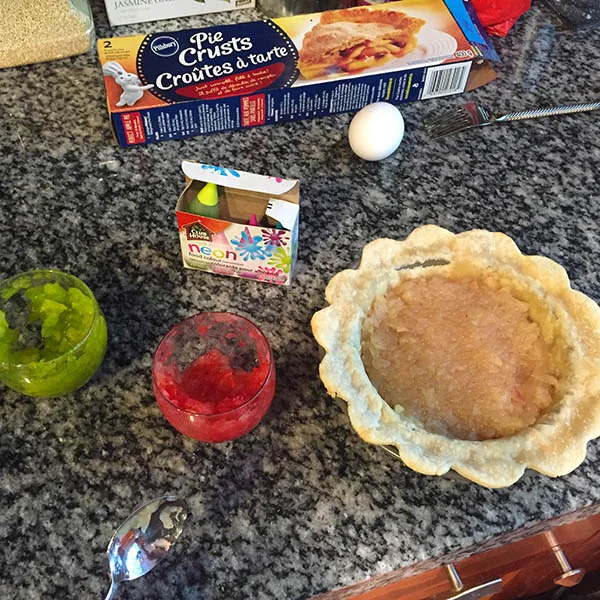
- the crust of your choice (I got lazy and used Pillsbury today)
- 3 large apples
- nutmeg, cinnamon, vanilla
- food colouring
How I Did It
Filling
Throw the 3 (peeled and diced) apples and spices in a pot and boil, mash, and drain until you have a fairly smooth consistency.
Separate into three containers, add food colouring to two of the containers and stir well.
Put containers in the fridge to cool.
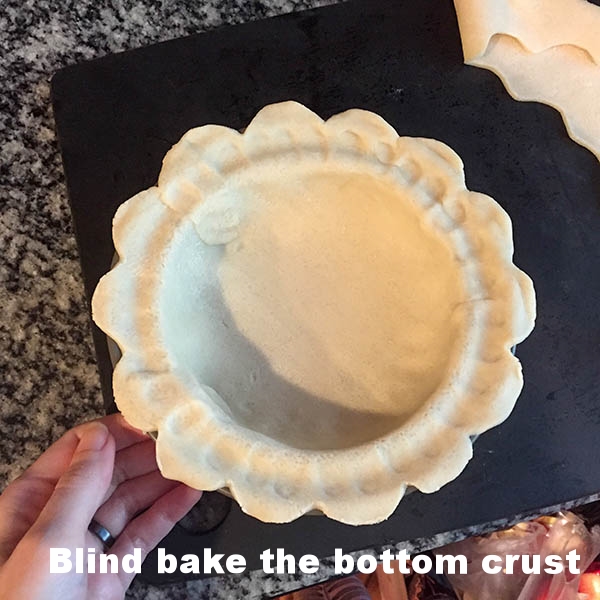
Bottom Shell
Line the bottom of your pan with your rolled dough and blind bake for 10 min at 400°F. I almost always blind bake my pie bottoms now as it allows the filling to sit in it for a few minutes longer without getting soggy, which gives you more working time when you are placing lots of fiddly elements.
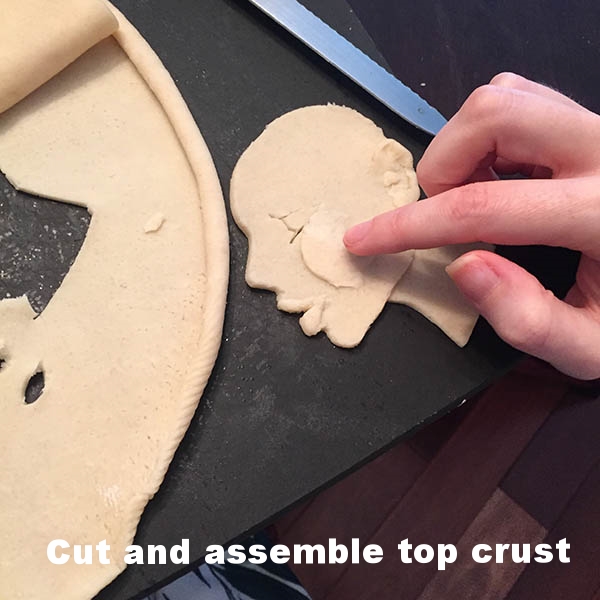
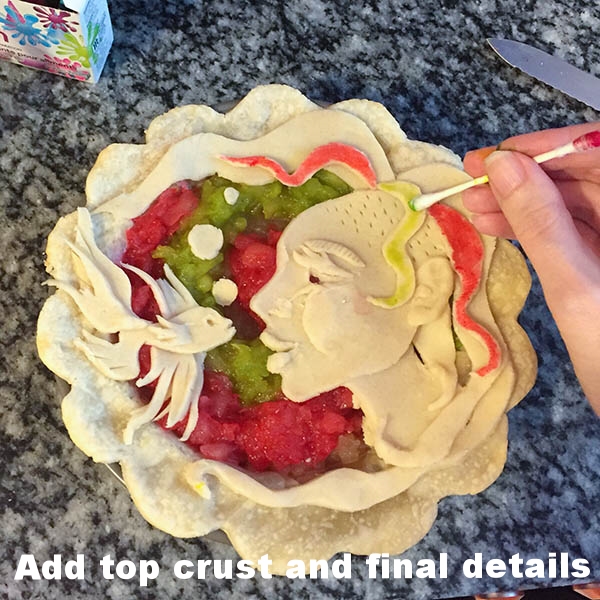
Top Crust
Sketch what you want to cut on paper first. You need to move fast with pie dough as it starts to dry out and get lame if you work with it too long.
Roll out your dough on a floured surface, and cut out basic shapes from your sketch with a sharp knife.
Add extra layers of dough details by using egg white to “glue” layers together and smooth down any blended areas.
Use your sharp knife to “draw” on some final details like the hair stubble and eyeball.
Assembly
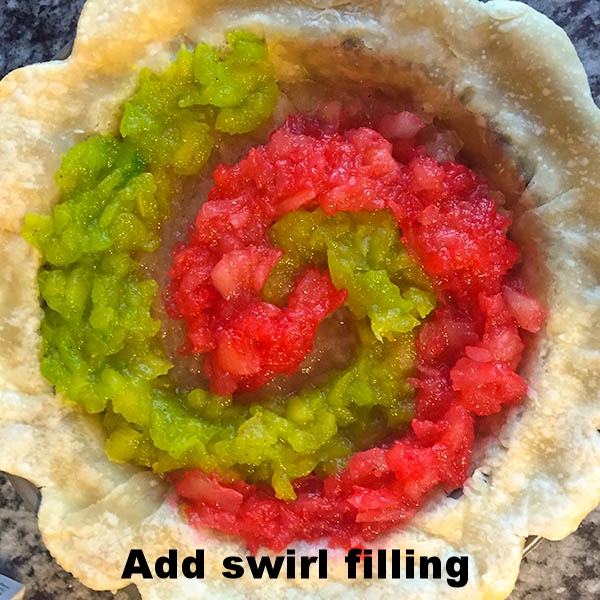
Only once all pieces ready to apply, add in the filling and create your colourful spiral.
Carefully transfer the dough pieces and press into the bottom crust.
Paint on a bit of extra food colouring with a Q-tip.
Egg white wash everything.
Bake for 20 min at 400°F. Keep an eye on it in case your oven is a bit hotter!
Done! Take pictures. Hashtag them #piesareawesome because pies are awesome. Eat. Feel good about yourself. Repeat.
Thanks for having me! If you enjoyed this tutorial and love pies and geeky/nerdy stuff, check out the rest of my pieoneering (did I mention I love puns too?) experiments at instagram.com/thepieous
Cheers,
Jessica (aka ThePieous)
instagram/thepieous
twitter @thepieous